
Twitter Replaces Periscope With Its Own Media Studio Producer Tool
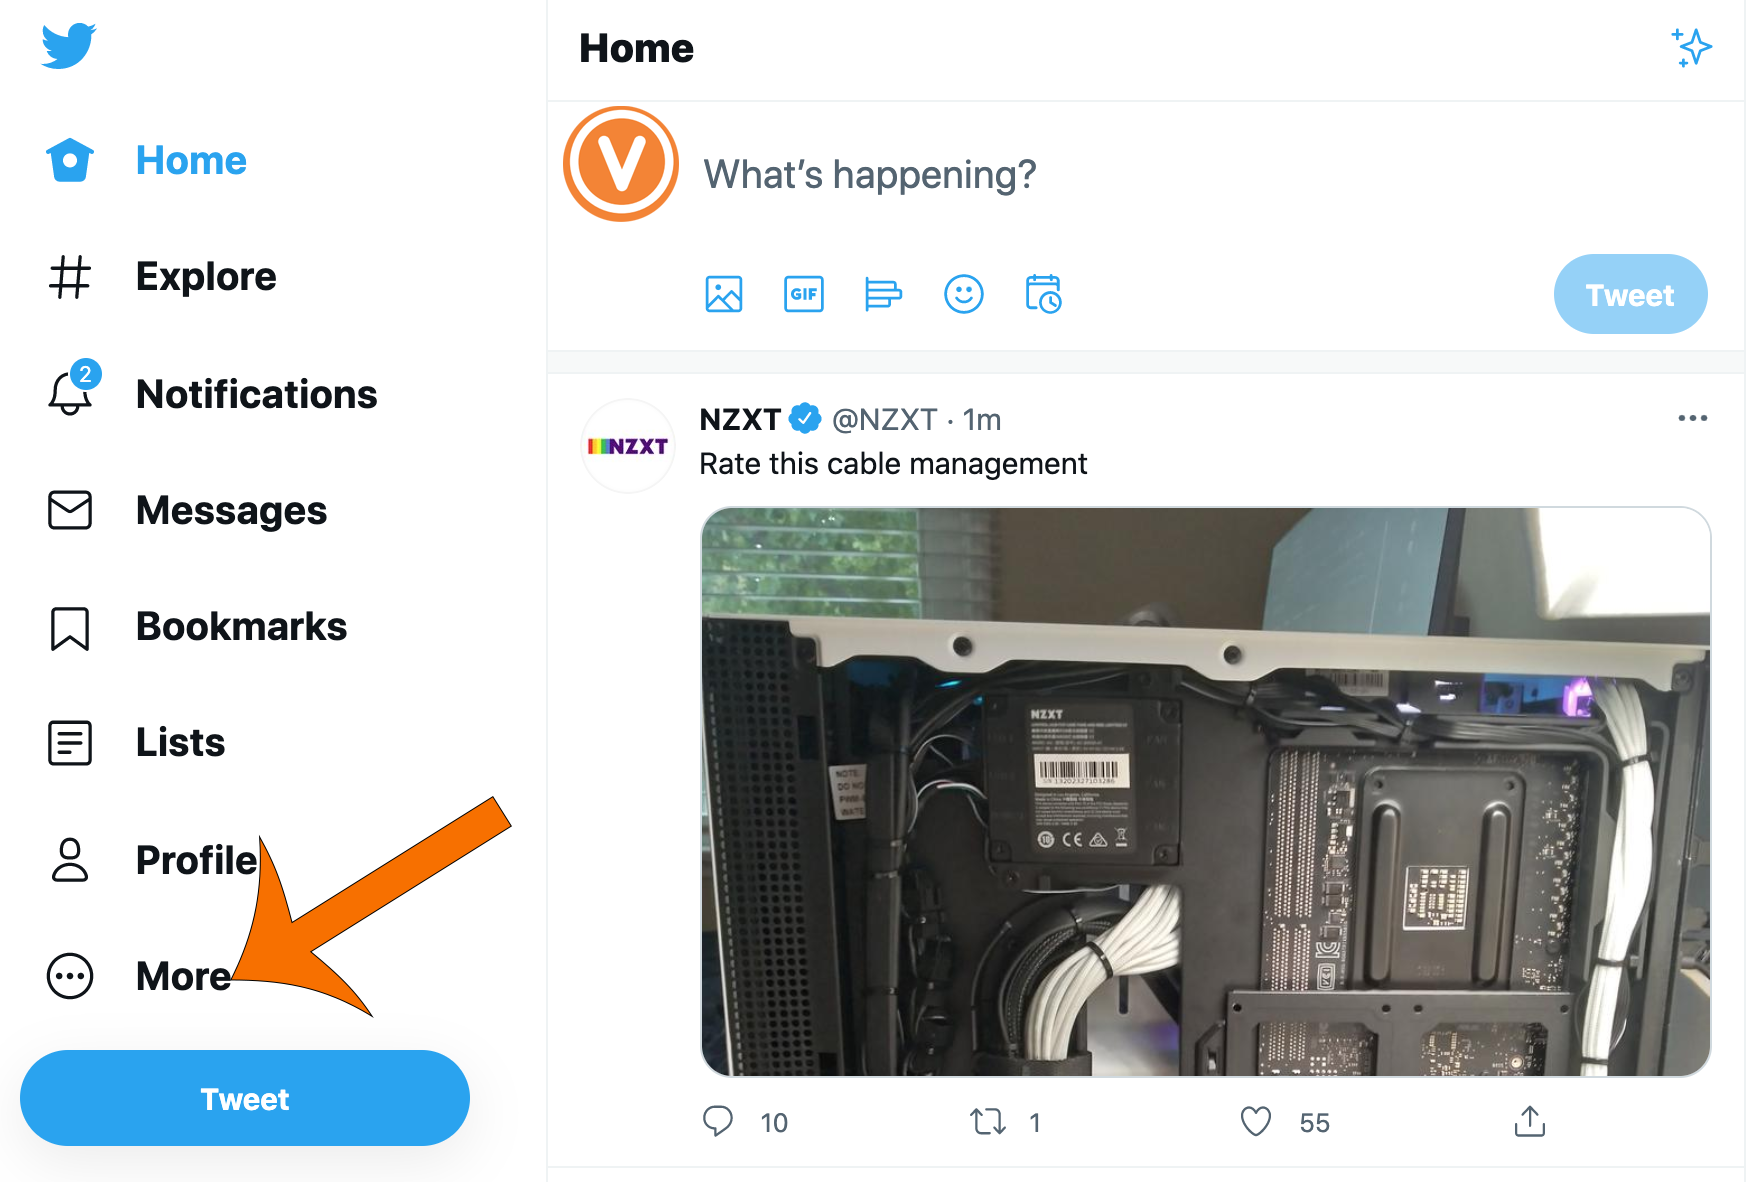
Since Twitter has now deprecated Periscope and offers in platform live streaming, I thought it would be a good time to revisit Twitter as a streaming platform. It is important to note that professional live streaming is not automatically available on every Twitter account, and is most easily accessed by accounts who spend ad dollars on the platform. You can however go live via the phone app on any Twitter account. If you have professional live streaming capabilities on your account, here are the steps to go live. From the home screen, check your left hand navigation bar and select “More” from the bottom.
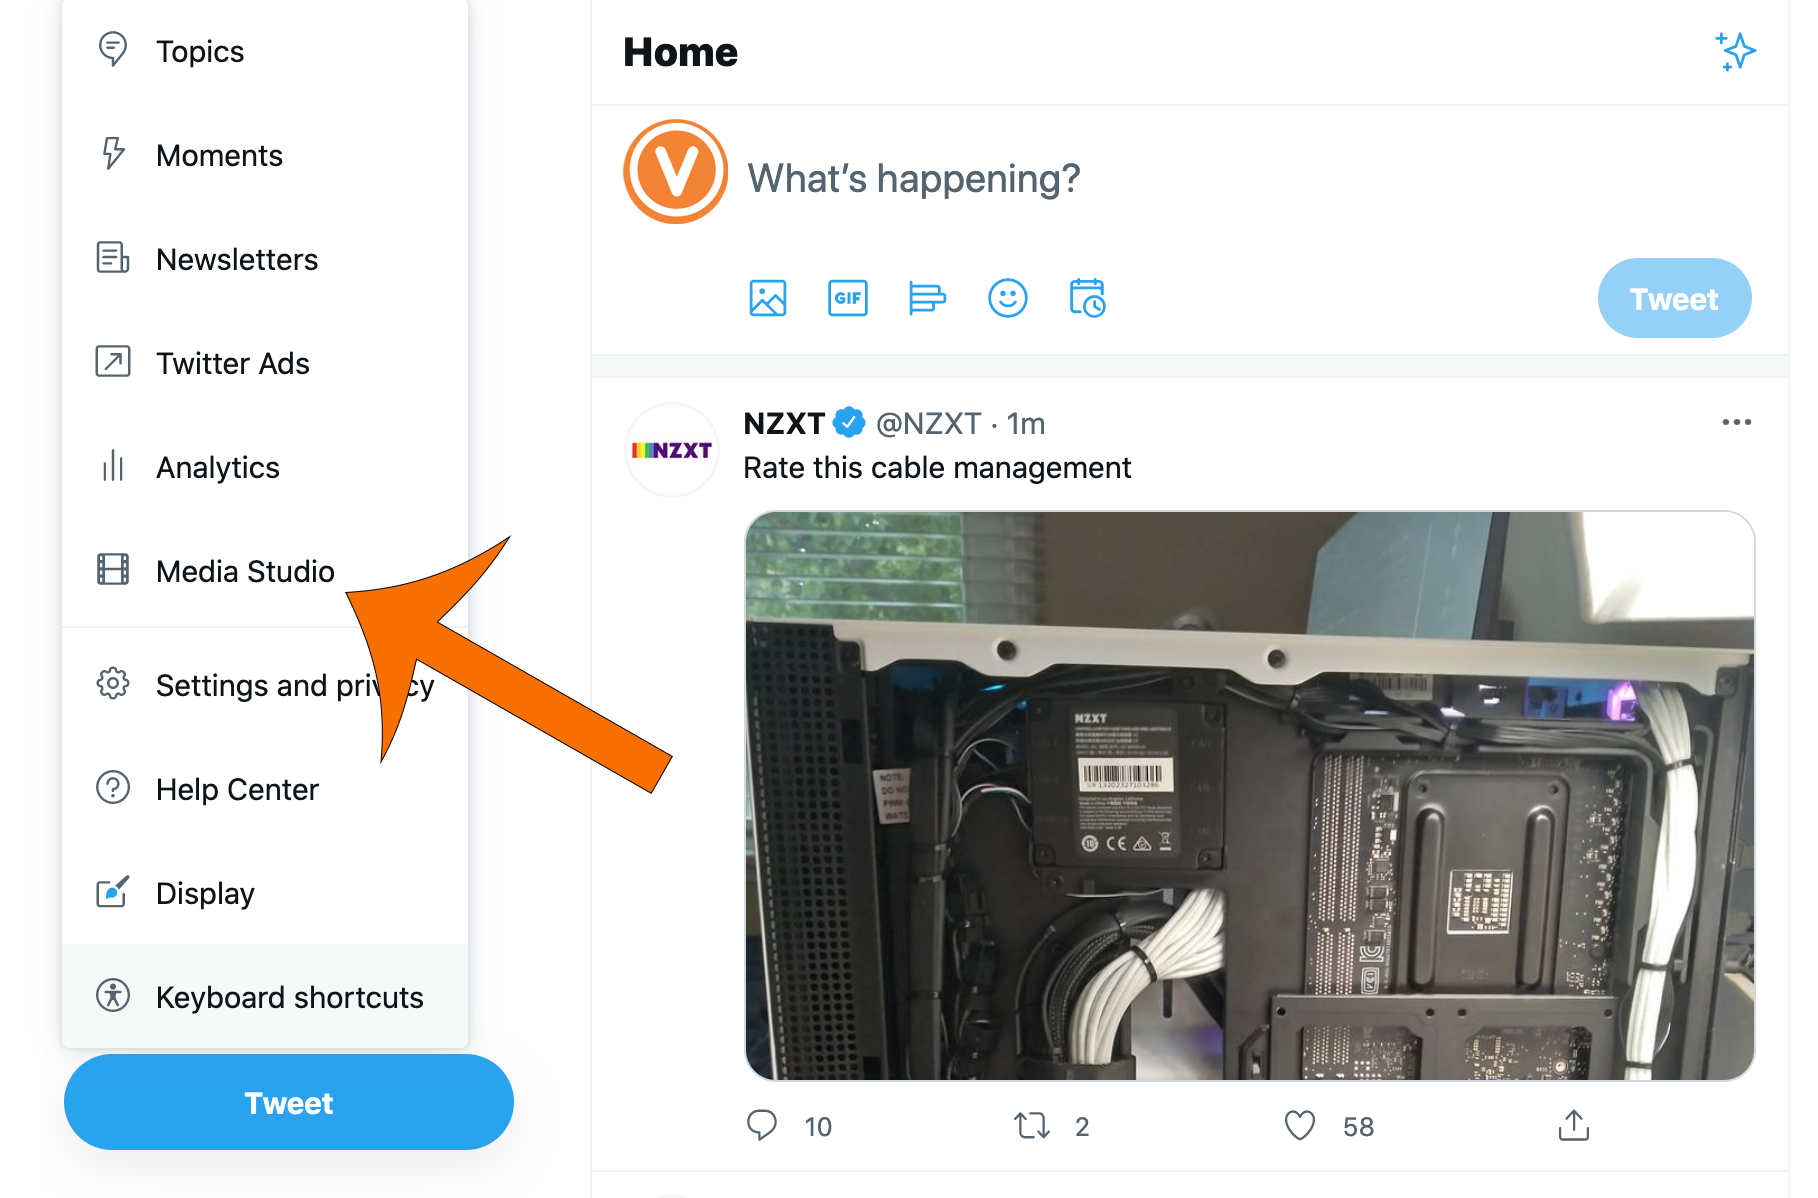
When you click “More” another menu will pop up, which will include the Twitter “Media Studio.” Select this option to enter the Media Studio.
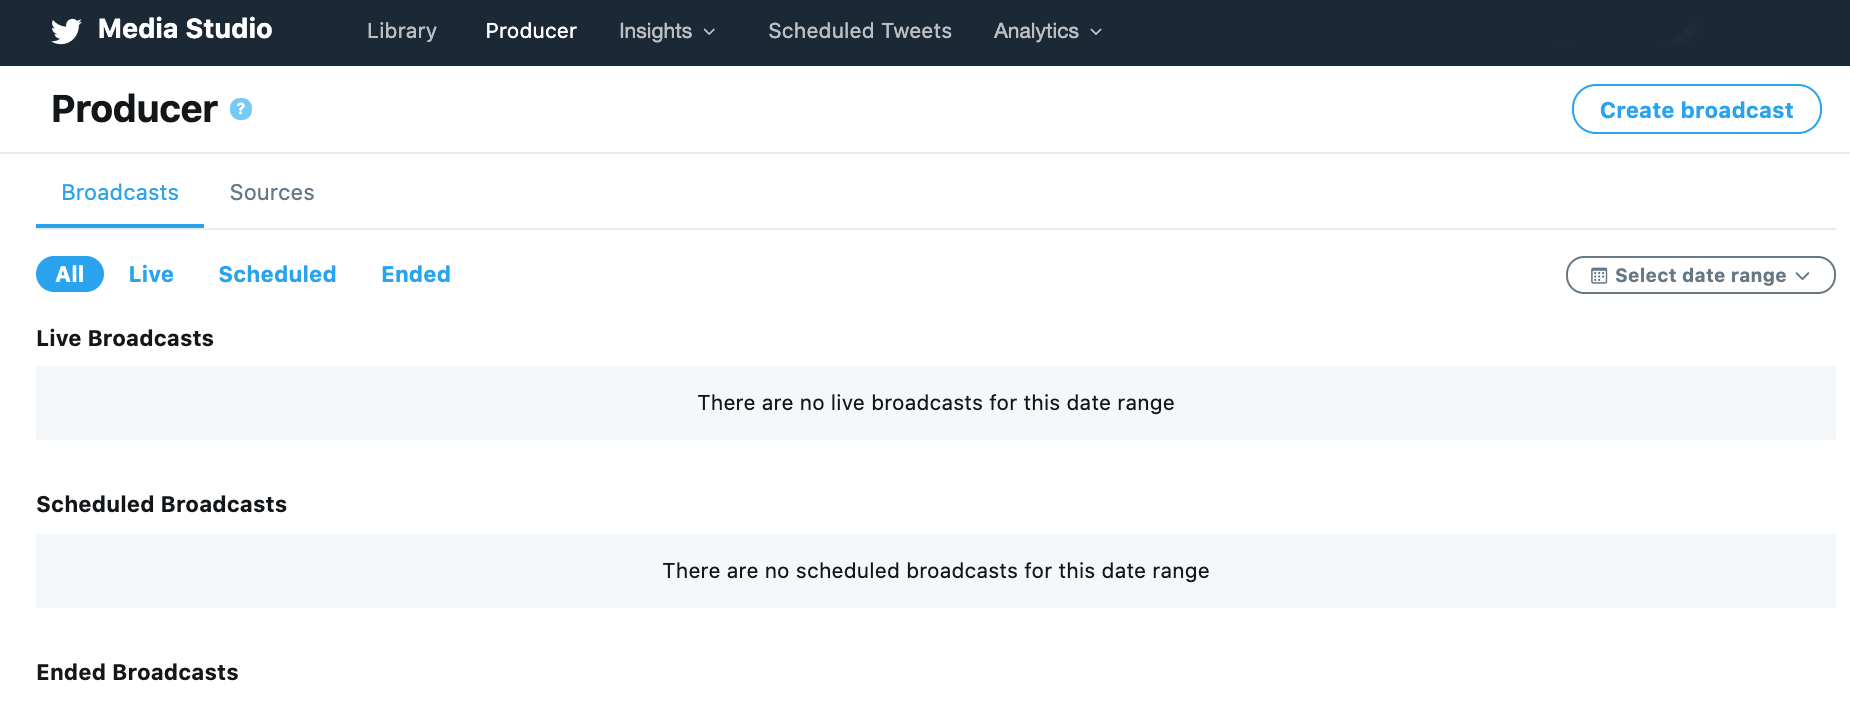
The Media Studio has tabs, which include “Library,” “Producer,” “Insights,” “Scheduled Tweets,” and “Analytics.” Live streaming will be found under the “Producer” tab.

When entering the “Producer” tab of the Media Studio you will see two more tabs (I know, tabs for daysss!), one for “Broadcasts” and one for “Sources.” Your “Broadcasts” tab is where you will see current live streams, scheduled live streams and where the archive of your past broadcasts can be found.
If you haven’t set it up before, the first thing you need to do is to go to the “Sources” tab and click the blue “Create Source” button on the right hand side. This is where you will create an RTMP source so that you have a server URL and stream key to enter into your encoder. Make sure not to share your stream key with anyone, this allows anyone access to steam on your account.

Now you can navigate back to your “Broadcasts” tab and create a new broadcast by giving the broadcast a name, category (you must choose one category from a list of categories), then you can select a source (select the RTMP source you just created) and then choose whether you want the audience to be public or private. Choosing the “public” setting under the audience tab does not actually tweet out your broadcast, like you might think though. Setting the privacy to public simply creates a share URL and makes it possible for you to schedule tweets with your broadcasts and promote your tweets with ad dollars.
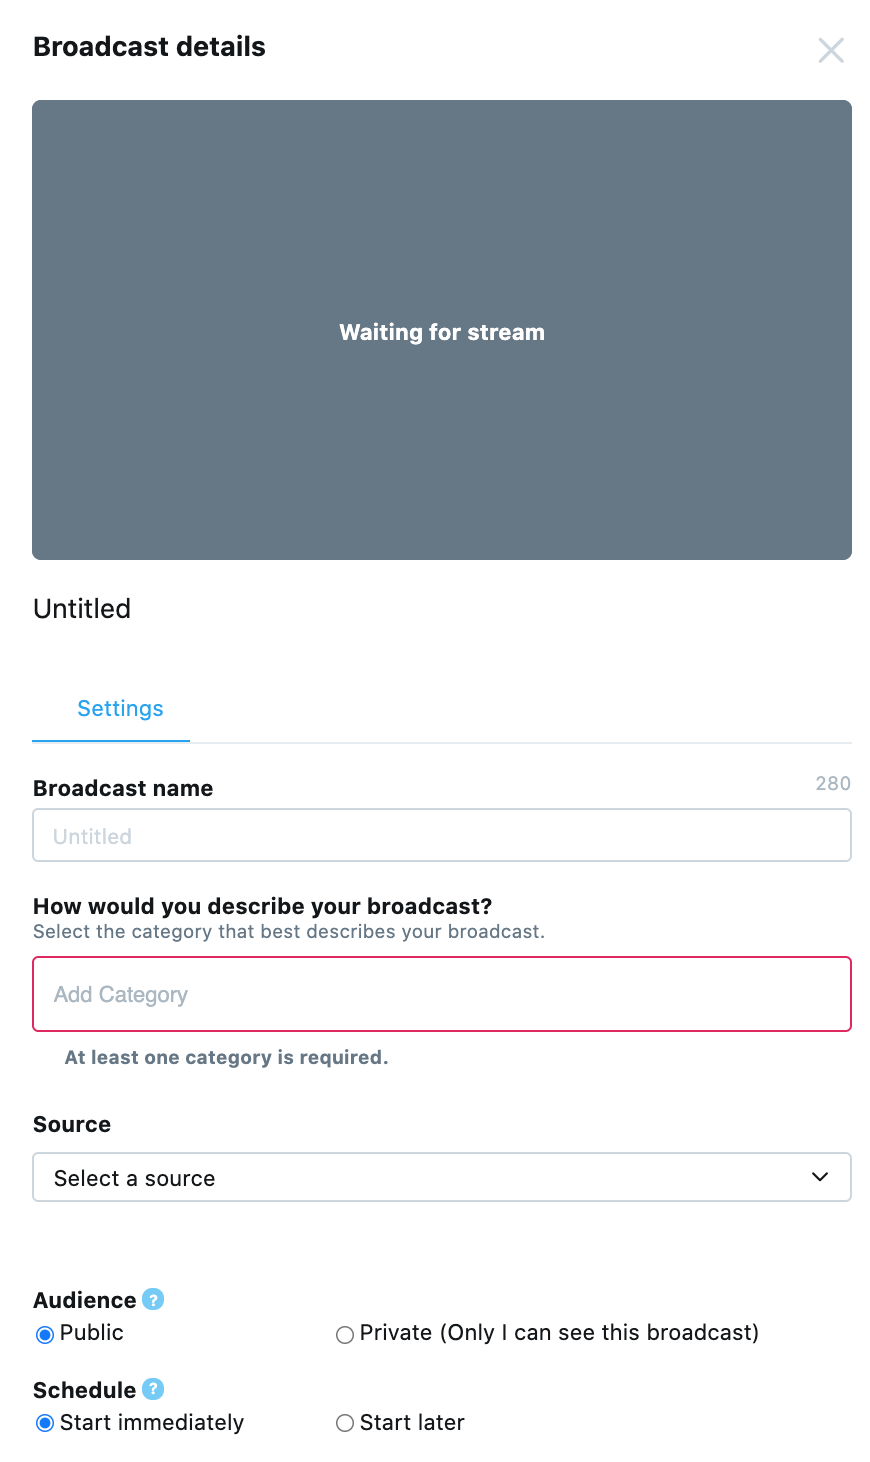
Next you need to choose whether you want to start your broadcast now or schedule it for a later time. Scheduling for a later time is recommended so that you have time to prepare your tweets and promotion posts, however there are some important things to note here. Twitter makes you choose a start time and an end time for the broadcast and they are very strict about it. If you are even one minute late sending a stream to the platform your broadcast will be deleted (unlike Facebook that gives you 10 minutes). Likewise, because you have to specify an end time, your broadcast will cut off at that end time, even when you don’t want it to. You can always manually stop a broadcast early, so make sure when you list an end time you are generous. At the time of writing this post, there is no auto start and stop on Twitter like there is on other platforms, which send your broadcast live anytime you are sending a feed, this is semi-auto by setting the time to start and stop on a clock if you are sending a feed.

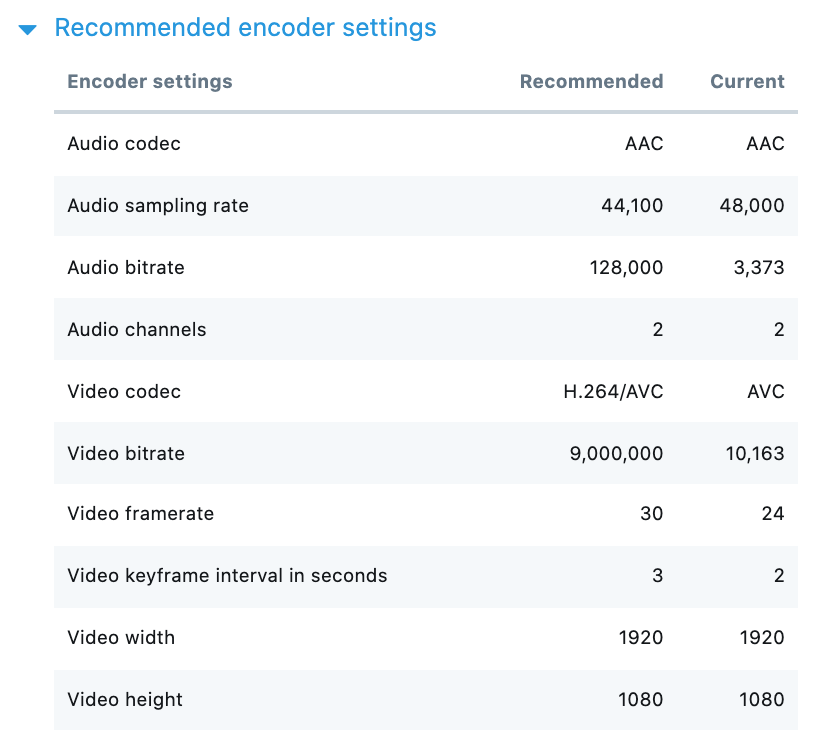
Next set it up to be recurring if you want and upload a thumbnail image to let people know what’s coming. Below that you can expand the recommended encoder settings to be sure you have them set up optimally in your encoder, I have copied the current one from my account here.
Having now done some big events on Twitter using their Media Studio, it was a great experience and our clients saw huge number, especially in their targeted promoted tweets. If your audience is on Twitter and you have a following, or if you have ad dollars to spend to do targeted posts promoting your stream, this is a great platform to stream to. Otherwise, be sure to schedule your posts, and go in and manually tweet your live stream, and share the link in your email blasts, etc.

